CS Team Onboarding
Documentation
Table of Content:
Tech -
System, Repo, db, redis, etc setup
System Setup
Mailing groups
Devops Access
NosqlBooster setup and walkthrough
Local Setup
Redis setup and walkthrough
Reporting KT , generating reports on local.
Codebase walkthrough + Live chat
Software support process
Intro to Live Chat
ELK tools and error finding
Bot builder + Cache Nlp
File Structure Codewise(OCS)
Bot Builder Exercise + First Assessment
Bot Builder Description
Bot building exercise - IDEATION + Conversational Designing.
Non Tech -
VI workflows and business understanding
Induction Training Videos : Business and Platform understanding + Laptop setup.
Exposure to Vi Bot - KT session
Exposure to Prod Testing with a set of Examples.
Overview on different channels and vi workflows for different lob and special features.
Dashboard and its features + Tasks
Dashboard walkthrough
KT on Clustering, Feedback analytics + Task and Cloud & its features.
KT on auditing and use of the Audit flag.
Ai training
Bot Hung Analysis and bot hung report
Additional CS Team Tasks
KT on Prelaunch QA
KT on UAT/ Production Testing
Chat Support -
- Introduction to Ori products - Orimon, VoiceGenie, etc
- More in Depth features understanding of Orimon - Channel integrations
- Chat flow - From Greeting to chat closing and feedback
- Issues resolution and support Process
A.1 - System Setup
1.1. Install Vs Code
- Link - https://code.visualstudio.com/download
- Video https://drive.google.com/file/d/1en0CAEIR4xK04nVrygk7cg1rekJ5xsp6/view?usp=drive_link
1.2 Install NoSql Booster
- Link-https://nosqlbooster.com/downloads
- Create a folder "AppImages" and Save the downloaded appImage in it.
- Open your terminal and run the below command -
Cd /\<pathOf"AppImages"Folder>
chmod a+x nosqlbooster4mongo*.AppImage
1.3. Install Node.js
- Step 1: Open Terminal and run below command sudo apt install nodejs
- Step 2: Once installed, verify it by checking the installed version using the following command: node -v or node –version
- Step 3: install NPM, use the following commands: sudo apt install npm npm -v or npm –version
1.3.1. Install NVM
- Step 1: curl -o- https://raw.githubusercontent.com/nvm-sh/nvm/v0.39.1/install.sh | bash
This command downloads and runs the NVM installation script. The version number in the URL may change over time, so it's a good idea to check the official NVM repository for the latest version.
Close and reopen your terminal, or run the following command to apply the changes: source ~/.bashrc
Verify that NVM is installed by running: nvm --version
This should display the installed version of NVM.
Note - Refer the below link to install/setup the node version(14.17.6)
https://www.digitalocean.com/community/tutorials/how-to-install-node-js-on-ubuntu-20-04
Video: https://drive.google.com/file/d/1KGcikyohPR1K1ZHLvMz0rfnNLOa0eB_V/view?usp=sharing
1.5. Setup Mongo
Video:
- Setting up mongodbhttps://drive.google.com/file/d/1MoYqNP4QPr09D_ZVBowq0R3Bp4Beny-Q/view?usp=sharing
- Creating and Run mongoDb Containerhttps://drive.google.com/file/d/1QxLB3iGamE-TjVBPpCf889KybRB02u1w/view?usp=sharing
Video:https://drive.google.com/file/d/1ioj12F8opJKrsg2XDKhsOpFhtiovd3sW/view?usp=sharing
1.6. Connecting Database to NoSqlBooster
Video:https://drive.google.com/file/d/1FN_hwJxZ5lx1pJjTc0OuGR2Fk66BFo5a/view?usp=drive_link
Basic Linux Commands to know - https://medium.com/@techbrackets/basic-linux-commands-that-every-user-should-know-techbrackets-9933c387bd44
A.2 - Mailing Groups
Ask your team lead/ manager/ person in charge to add you into the mentioned mailing groups, once added, verify, additionally add a professional signature in the google mail settings, like the attached one below

chatbot_team@oriserve.com (test otp )
A.3 - Devops Access
3.1 Mail Devops in below format to get access for the repos.
Hi Team,
I need read/write access to the following repositories:
OCS
brand-files
chatbot-2.0
chatbot-dashboard
chatbot-dashboard-2.0
user-management
Scheduler
Team: CS Team
Reason: Debugging of issues
3.2 env - click here
3.3 Branch
OCS-
Brand-files -
Chatbot2.0 -
Dashboard -
A.4 - NoSQLBooster Setup
- Link-https://nosqlbooster.com/downloads
- Create a folder "AppImages" and Save the downloaded appImage in it.
- Open your terminal and run the below command -
Cd /\<pathOf"AppImages"Folder>
chmod a+x nosqlbooster4mongo*.AppImage
A.5 - Local Setup
As you've access to all the above mentioned repos, Let's Get Started -
5.1. Repositories Cloning
- Generate system ssh key using below command ssh-keygen Then keep pressing "enter tab"
cat ~/.ssh/id_rsa.pub
Login in to bitbucket with your official Id and follow the steps shows in the below video. https://drive.google.com/file/d/1XSBs9urks5yGM97JAl2tr_-htlfLFn-O/view?usp=sharing
Clone the repos as notes below - OCS Brand-files (Clone "brand-files" under "Brainservice" of "OCS") (Video:https://drive.google.com/file/d/15h0HlH7nGzQiK64xXBQ60lONNdaho-yX/view?usp=sharing) Chatbot2.0 Chatbot-dashboard Chatbot-dashboard-2.0 User-management
Video: https://drive.google.com/file/d/1MZ4qxoL1uNv4OJkDXX2Pi8KUX70PTcnQ/view?usp=drive_link
- Create a .env file under oriserve-communication-service and paste the env mentioned under 2.2 in it. Please change the the following in env - SERVER_URL="http://localhost:8080"
cacheNLPResponse='true' CS_REDIS_URL= CS_DB_URL= CS_DB_USERNAME= CS_DB_PASSWORD= CS_DB_NAME =
- Checkout OCS, Brand-files to the branches as mentioned above.
- npm i
5.2. Connection of Chatbot with OCS Setting up the OCS URL inside Chatbot-2.0
- Inside Chatbot open --urls.js--
- Path: --chatbot-2.0/src/data/config/urls.js--
- Change the --socketUrl-- path to - http://localhost:8080/liveConversations
5.3. Run Chatbot and OCS Check if local environment is set up by running both Chatbot and OCS
- Any message from Chatbot should be displayed on the console of OCS
- Equivalent response to be delivered in Chatbot as well
5.4. Creating your dashboard login password -
- Go to db and "adminusers" collections and insert a new document.
- In the new document, change the "firstName", "lastName", "email".
- Start your dashboard 2.0 locally and click on "forgot password".
- Type in your mail id which you added in the db document.
- You will receive password reset mail on your same mail id.
5.5. Start Chatbot-Dashboard locally -
- Open chatbot_dashboard in VS Code.
- Checkout to the mentioned branch
- Go to Path: --chatbot-dashboard/src/data/urls.js And make the following changes - const BASE_URL_USERS = 'http://localhost:8087/'; const BASE_URL = 'http://localhost:8080/'; const BASE_SOCKET_URL = 'http://localhost:8080/';
A.6 - Redis Setup
Video:https://drive.google.com/file/d/1PAztJGmBthv2kyq_FaUKzpNYehtqopds/view?usp=sharing
A.7 - Reporting KT , generating reports on local.
Video:https://drive.google.com/file/d/1C3_-YErceN_1ovKSzHYVqWuLJTTkTvEs/view?usp=drive_link
B.1 - Software support process
For Non-VIL projects kindly skip the remedy part and refer to the TAT table below for the process. Kindly note the communication process may differ for different projects.
Step 1 - When an incident is raised by the clients in remedy, the team member in that respective shift has to change the status of the incident to 'In progress' in the remedy tool.
Step 2 - Send an acknowledgement to clients by mail if the incident is raised via mail.
Step 3 - Check and revert if required artefacts are not present.
Step 5 - Validate the incident
Step 5.1 - If it's not a valid issue, acknowledge the clients over mail and close the ticket in remedy.
Step 5.2 - If the issue is not related to our application, add note in remedy and assign it to the respective team's bucket. In case the team is not present on remedy add note and mention the same in resolution in textbox that issue ino related to ori application and change the status to 'resolved' and close the ticket.
Step 6 - Create a ticket in clickup for the respective incident raised with all the details. Assign criticality level(Critical/High/Medium/Low) to the ticket based on the business impact and client rationale.
Step 7 - Analyze the incident and perform preliminary level analysis.
Step 8.1 - If the support team can resolve the incident, they can add it to their backlog with their name as the Assignee(clickup & Remedy tool).
Step 8.2 - An acknowledgement needs to be given to the respective Project manager/Team lead by the team.
Step 8.3 - The team has to perform RCA within the adhered TAT. If it takes more time than the TAT, acknowledgement of the same should be given to all stakeholders along with clients.
Step 8.4 - Once RCA is completed, the team should share the estimated time needed for fixing the issue with the Project manager/Team lead..
Step 8.5 - Once the incident has been resolved, kindly change the status of the ticket in both clickup and remedy to Done/Resolved.
Step 9.1 - Based on preliminary level analysis, if the support team thinks that support from the core team is required to resolve the issue, they should reach out to the respective team. Chatbot - Anand & Team Livechat - Luv & team AI Issues - Saddam & team Reporting Issues - Anand , Frontend issues - Mohit & team
Step 9.2 - Assignee name in both clickup & Remedy should be changed as per the person taking responsibility for the ticket. The assignee would be responsible for changing the status of both the tickets.
Step 9.3 - The team has to perform RCA within the adhered TAT. If it takes more time than the TAT, acknowledgement of the same should be given to all stakeholders along with clients.
Step 9.4 - Once RCA is completed, the team should share the estimated time needed for fixing the issue with the Support team/ Project manager/Team lead..
Step 9.5 - Once the incident has been resolved, kindly change the status of the ticket in both clickup and remedy to Done/Resolved.
Step 10 - If the ticket is open or WIP for more than 48 hours take a followup update from the respective owner.
Step 11 - Record and maintain the RCA for the respective incident raised.
Step 12 - Keep the resolved ticket under monitoring for 3 working days.
TAT defined below
| Sr. no. | Task | Criticality | Business Impact | TAT (Working hours) | TAT (Non-working hours) |
|---|---|---|---|---|---|
| 1 | Change remedy ticket status/Send an acknowledgement to clients via email that we are currently looking into it | Critical | Very High | 1 hr | 2 hr |
| High | High | 2 hrs | 4 hr | ||
| Medium | Medium | 2 hr | 4 hr | ||
| Low | Low | 2 hr | 4 hr | ||
| 2 | Check and revert if required artefacts are not present. | Critical | Very High | 1 hr | 2 hr |
| High | High | 2 hr | 4 hr | ||
| Medium | Medium | 2 hr | 4 hr | ||
| Low | Low | 2 hr | 4 hr | ||
| 3 | Validate the incident/Issue | Critical | Very High | 1 hr | 2 hr |
| Not a valid issue | High | High | 2 hr | 4 hr | |
| Not of our bucket | Medium | Medium | 2 hr | 4 hr | |
| Low | Low | 2 hr | 4 hr | ||
| 4 | Create clickup Ticket | Critical | Very High | 1 hr | 2 hr |
| High | High | 2 hr | 4 hr | ||
| Medium | Medium | 2 hr | 4 hr | ||
| Low | Low | 2 hr | 4 hr | ||
| 5 | RCA - where? How much time? | Critical | Very High | Same day | Same day |
| High | High | Next day | Next day | ||
| Bring this into practice. If rca takes more time, communicate to clients about it. | Medium | Medium | Next day | Next day | |
| Low | Low | Next day | Next day | ||
| 6 | If Ticket Owner=Support Team & ticket is not resolved, an acknowledgement to be sent to the clients with latest status and estimated days of completion if available or sure of it. | Critical | Very High | 1 day | 2 days |
| High | High | 3 days | 5 days | ||
| Medium | Medium | 3 days | 5 days | ||
| Low | Low | 3 days | 5 days | ||
| 7.a | If ticket owner=core team. Support team to take followup within | Critical | Very High | 1 day | 1 day |
| High | High | 2 days | 4 days | ||
| Medium | Medium | 2 days | 4 days | ||
| Low | Low | 2 days | 4 days | ||
| 7.b | an acknowledgement to be sent by the Support team to the clients with latest status and estimated days of completion if available after taking followup from the core team. | Critical | Very High | 1 day | 1 day |
| High | High | 2 days | 4 days | ||
| Medium | Medium | 2 days | 4 days | ||
| Low | Low | 2 days | 4 days |
clickup Subtask
- Check artefacts & validate Issue
- Perform RCA
- Implement Fix
- Perform UAT
- Deploy Fix on Prod
- Perform Production UAT
- Create RCA Doc
| Subtask | Original estimate | Actual SP |
|---|---|---|
| Check artefacts & validate Issue | 0.5 | |
| Perform RCA | 3 | |
| Implementation in progress | 1 | |
| Code review | 0.5 | |
| Perform UAT | 0.5 | |
| Dependency on Client | ||
| Deploy Fix on Prod | 0 | |
| Production UAT | 0.5 | |
| Create RCA doc | 1 | |
Live chat TAT-
Support team to look into issue for 2 days
If not resolved, transfer to live chat team
After 5 days , if not resolved, discuss with anurag sir on the issue.
B.2 - Intro to Live Chat
It is a way for an agent to interact with the customer via our dashboard.
Video-https://drive.google.com/drive/folders/1fWTOH2JzVGuyvqP04iLO1uc1ujB9O2uC
B.3 - ELK tools and error finding
Elk is a tool that we use to find the issue in our code with the help of logging. This allows us to find the actual client as well as agent lifecycle logs which helps us immensely with debugging issues. The below video will help you with how to use ELK for debugging purposes.
Video - https://drive.google.com/drive/folders/1fWTOH2JzVGuyvqP04iLO1uc1ujB9O2uC
B.4 - Cache Nlp
Introduction:
In natural language processing (NLP), the term "cache NLP" refers to a mechanism used to enhance the accuracy of intent recognition in AI systems. Intent recognition involves understanding the user's intentions, and it heavily relies on the training of AI models. The quality of training directly impacts the performance of the system. However, there are instances where AI mappings may be incorrect or result in low confidence scores or fallbacks.
To address these issues, especially for certain utterances or buttons that may pose challenges to the AI model, a concept called " cache NLP" is employed.
Purpose of Cache NLP:
To mitigate issues related to certain utterances or button clicks , we introduce a concept called "Cache NLP." When a user sends an utterance, instead of immediately calling the AI for intent mapping, we first check if the keyword associated with the utterance exists in the Cache NLP collection. If a match is found, the bot follows a predefined flow based on the associated document, eliminating the need for an AI call. This approach proves beneficial for handling specific keywords, like those associated with buttons such as " recharge ," " balance ," or " offers."
How Cache NLP Works:
When a user's utterance is received, the system searches a cache NLP collection for keywords before making an AI call for intent mapping. If a matching document is found in the cache NLP collection, the system follows a predefined flow based on the data in that document without the need for an AI call. This approach proves beneficial in scenarios involving predefined responses to specific keywords, such as buttons like "recharge," "balance," "offers," etc. By storing these predefined responses in the cache NLP collection, the system can avoid issues like intent miss-mapping, fallbacks, or low confidence scores for these specific cases.
Cache NLP Document Structure:
Below is an example structure of a Cache NLP document:
  "_id": ObjectId("xxxxxxxxxxxxxxxxxxxxxxxx"),
  "text": "user text / button text",
  "analysisResponse": {
    "intentName": "Intent_name",
    "statusCode": 200,
    "initialNlpAnalysisSnapshot": {
      "name": "oriNlp",
      "intentSnapshot": {
        "intent": "Intent_name",
        "score": 0.959
      },
      "entitySnapshot": []
    },
    "entities": {
      "language": "english/hindi",
      "languageSetFromNLP": true
    }
  }
}
Understanding the Cache NLP Document:
_id : Unique identifier for the document.
text: The user text or button text for which the document is created.
analysisResponse: Details of the NLP analysis response.
intentName: The intended intent associated with the text.
statusCode: HTTP status code (e.g., 200 for success).
initialNlpAnalysisSnapshot : Snapshot of the initial NLP analysis.
intentSnapshot: Snapshot of the identified intent and its confidence score.
entitySnapshot: Details of identified entities (if any).
entities: Additional information about entities, such as language and its source.
Understanding Cache NLP with an Example
Let's take an example of a " recharge" button. If we want the system to trigger the "recharge" intent whenever a user mentions "recharge" or clicks the "recharge" button, we create a cache NLP document for it. This document specifies the intent name, a high confidence score, and the language of the utterance (English or Hindi, depending on the user's input).
  "text": "recharge",
  "analysisResponse": {
    "intentName": "recharge",
    "statusCode": 200,
    "initialNlpAnalysisSnapshot": {
      "name": "oriNlp",
      "intentSnapshot": {
        "intent": "recharge",
        "score": 0.9593519568443298
      },
      "entitySnapshot": []
    },
    "entities": {
      "language": "english",
      "languageSetFromNLP": true
    }
  }
});
In this document, "recharge" is associated with the "recharge" intent, ensuring a smooth flow for any user interaction related to recharging. The confidence score is set above 0.75 to ensure reliable intent mapping.
By executing this query, we add a document to the cache NLP collection, ensuring that the system responds appropriately to user inputs related to the "recharge" keyword.
Conclusion:
Cache NLP proves to be a valuable strategy for optimizing the performance of chatbots by predefining responses for specific keywords, mitigating potential issues related to intent mapping and confidence scores.
B.5 - File Structure CodeWise OCS
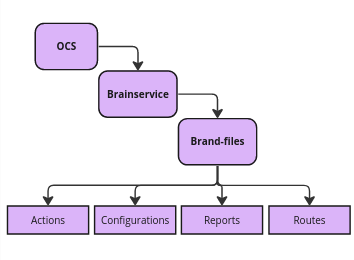
OCS: The Ori-Communication-Service serves as the foundational platform encompassing both brand-specific files and standardized files/components, including essential functions that facilitate the connection, execution, and operation of the chatbot system.
Brainservice: Brainservice, as the name suggests, can be referred to as the "Brain of OCS". It contains all the Brand-Specific functionalities and configurations. Its primary role involves transferring control to the brand level, serving as the central hub for managing and executing brand-specific operations within the OCS architecture.
Brand-files: This differs depending on brand.
- Actions: This folder contains files like "brand-actions.js" where the code for brand functions is written, "api_calls.js" .
- Configurations: Under this, "constants.js" contains functions and mappings that remain static, serving as constants throughout the system. These constants can be seamlessly employed across various files by importing them as needed, aligning with specific use cases. Also, "api_layouts.js" are written here.
- Routes: This contains "brand-routes.js".
C.1 - Bot Builder Description
Bot builder Ppt Link - Bot Builder Page
Bot Builder Video - link
Workflows - These are used to build/design the chatbot flow as per requirements.
- Step 1: click on "add workflow" in the top right corner and create a new workflow with the name of your choice.
- Step 2: Refresh the page and click on the workflow you just created. You'll already get one node by default.
- Step 3: Edit node and enter the edge variable, action specific to the functionality of the node. You can similarly create and attach further nodes or add another workflow as well. Note - Make sure to reset the node & message variable at the edge of each node.
Intents - Intents help chatbot know what the users want.
- Step 1: click on "add intent" in the top right corner and create a new intent with the name as required DON'T FORGET TO TURN ON THE STATUS and click on "create".
- Step 2: Refresh the page and search the intent you just created and click on edit icon.
- Step 3: Add utterances for this intent. You can attach any workflow to this intent, reset the variables of the attached workflow at intent level. Some intents can also be created to display static messages. To do so , "message before" can be attached at intent level.
Bot Messages - As the name suggests, these are the messages displayed on chatbot to the end user. Apart from creating messages from dashboard, there are two other ways as well -
- with the help of custom_message_doc (code level)
- Inserting message from DB (inserting document in messages collection)
Note - Refer to the knowledge base to see the message type that can be created.
Bot Params - Variables that are attached to messages and workflow as node variables are created here.
Brand functions -
- Step 1: click on Add New button then write function Name and Description.
- Step 2: After creating a function make sure to make it status " Active".
- Step 3: After creating brand function, go to edit button of node in workflow and there in " Action" dropdown select your brand function name you want to connect with that node.
- Step 4: After creating brand function through dashboard, write it's code in brand-action.js
Refer to the video below to see a how to build a demo workflow using bot builder : https://drive.google.com/file/d/1fsMo8l9_J2_3YAx45550-go1Nyvh4R9o/view?usp=sharing
C.2 - Bot building exercise - IDEATION+Conversational Designing
You are tasked to create a chatbot using bot builder, once it is developed it will be scored on the basis of the design choices, technical approach, user experience.
D.1 - Induction Training Videos : Business and Platform understanding
- Please go through the videos provided below to get a better understanding of the product. Video: Product Training Videos_Business & Platform Understanding
D.2 - Exposure to Vi Bot
- Pdf Link : VI PDF
- Video : Intro to VI
D.3 - Exposure to Prod Testing with a set of Examples.
- Sheet Link - Testing sheet
- Video:Prod testing
D.4 - Overview on different channels and vi workflows for different lob and special features.
Sheet Link - channels sheet Video:overview of different channels
E.1 - Dashboard walkthrough
Sheet Link : sheet
E.2 - Clustering, Feedback analytics
Video : Clustering/QA
E.3 - Auditing and use of the Audit flag
E.4 - Ai training
- DOC : AI training
- Video : AI training
E.5 - Bot Hung Analysis and bot hung report
F.1 - Prelaunch QA
- Test Sheet: Pre launch QA
F.2 - UAT/ Production Testing
- Test Sheet : prod testing
G.1 - Introduction to Ori products - Orimon, VoiceGenie, etc
Website Links: Orimon, VoiceGenie
Orimon.ai is the most sophisticated chatbot-like, sales-enabling chatbot builder. Build and deploy a pre-trained, intelligent chatbot within 2 minutes. The AI only needs your company's website URL to get started.
Problem : You spend thousands of dollars increasing traffic but fail to convert more.
Solution : Build your own conversational AI bot in minutes. With advanced sales-enabled conversational AI, engage your audience with almost human-like, capable AI-led conversations. A bot that understands intent, objectives, and +150 languages and is intelligent enough to re-direct conversations towards your brand goals. Powered by OpenAI's GPT4 and Google's globally awarded No. 1 sales-boosting conversational AI, Oriserve, Competitive advantage: The most advanced, patent-pending AI technology has a massive knowledge base of various industries and customer journeys. Trusted by the best enterprises across sectors and geography, validated by the best globally.
Video: https://youtu.be/-dxxyinQ-Vw andhttps://youtu.be/gzcYxgzJy_Y
G.2 - More in Depth features and understanding of Orimon - Channel integrations
- Introduction to Orimon AI and Dashboard
Bot creation, Flag and train, setting up appearance
Bot creation: Video link
Flag and train: Video link
Setting up the appearance:
3.1 Setting Theme Color: Video link
3.2 Setting the Message Bubble: Video link
3.3 Setting the Bot Header: Video link
3.4 Setting Trigger Icon: Video link
3.5 Setting the Welcome Message: Video link
3.6 Setting a Fallback Message: Video link
3.7 Setting Lead Form: Video link
3.8. Adding Quick Replies: Video link
3.9 Custom Query Placeholder: Video link
G.3 - Chat flow - From Greeting to chat closing and feedback
Canned response: Orimon - Canned Response Sheet,
Email script: Email Script- 1, Email script 2
| Opening | Greeting, name exchange, branding, and asking for assistance |
|---|---|
| Acknowledgement and Assurance | |
| Apology and empathy | (Only if required.) |
| Hold and un-hold | Permission, duration, reason and time |
| Resolution | concise and clear |
| Further Assistance | |
| Closing | Greeting and branding |
G.4 - Issues Resolution and support Process
To document the interaction we had with the client, we used a click-up.
- How to escalate concern for Orimon Live Chat
Steps for tracking the chat incident and escalating the concern
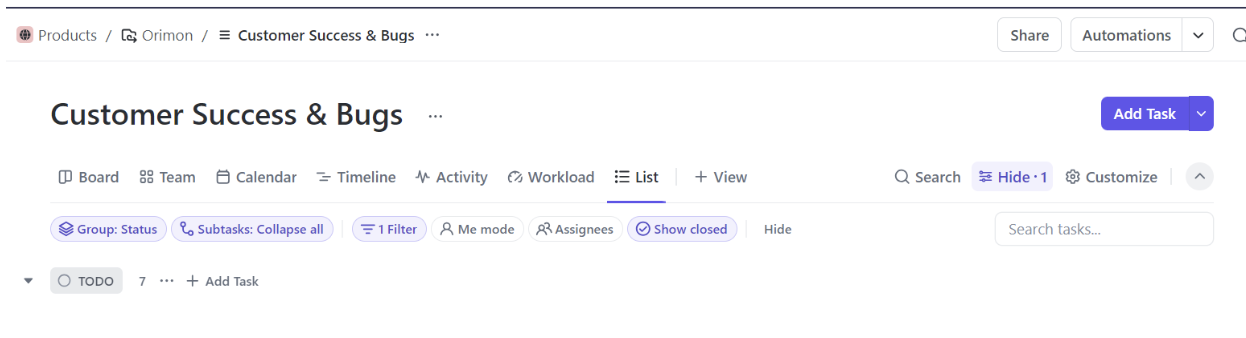
Products > Customer success > Add task > task name > description > status (to do/in progress/closed)> Assignee> Due dates> Priority > assignee > due dates > priority > tags ( Orimon live chats tag will be used for live chat incident tracking)
Reference 1:
Reference 2:
x
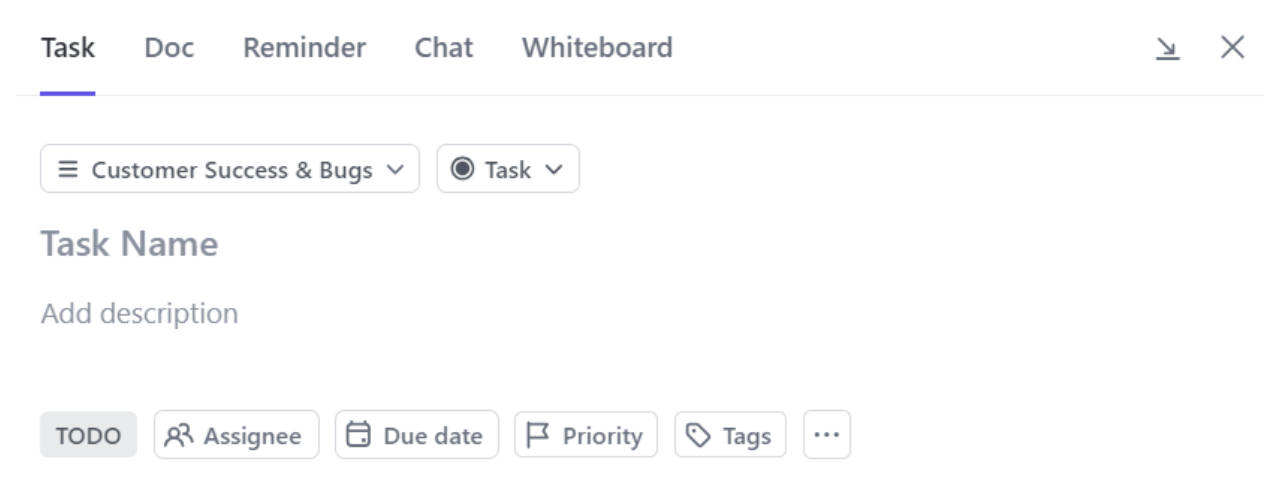
The description should have the following fields:
Email ID:
Name:
Bot link
Concern: (Should be in a properly described manner)
The client asks for or is looking for:
Spocs for issue Category:
Based on the concern, we can escalate the issue to the dedicated team, and the SPOC's names are given below:
| Front End | Mohit Gupta |
|---|---|
| Back End | Nipun Jain, Sidharth Jain |
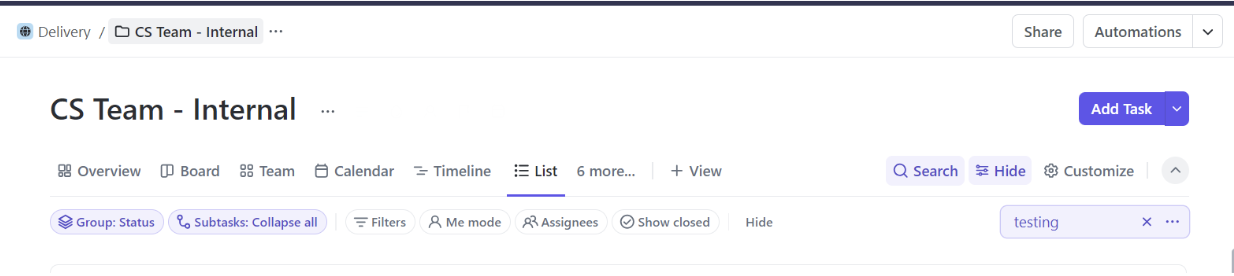
- How to create a ticket for resolved incident
Steps for tracking the chat incident that was resolved.
Delivery> CS Team - Internal > Add Task> task name > description > status (to do/in progress/closed)> Assignee( me) > Due dates ( incident date)> Priority > Tags( Orimon live chats tag will be used for live chat incident tracking)> Time estimate (time taken for chat resolution).
Reference 1:
Reference 2:
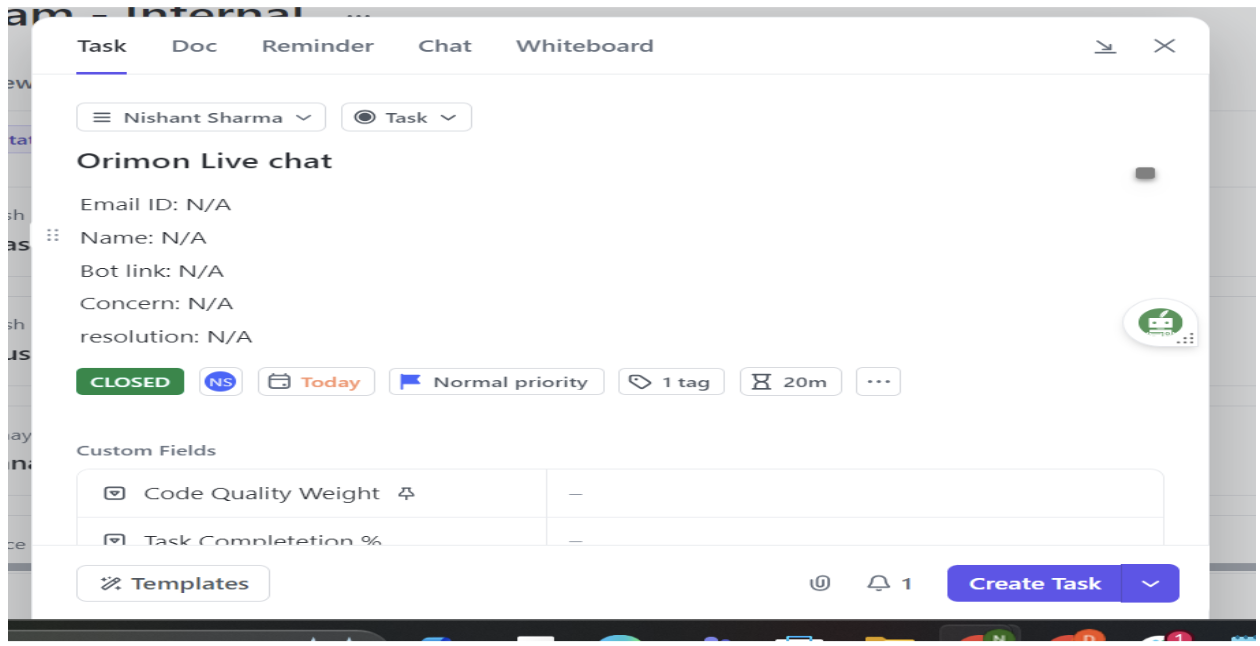
The description should have the following fields:
Email ID:
Name:
Bot link
Concern: (Should be in a properly described manner)
resolution: